A practical guide that explains how to size, design, proof, and export artwork for custom mugs using common mug printing tool workflows.
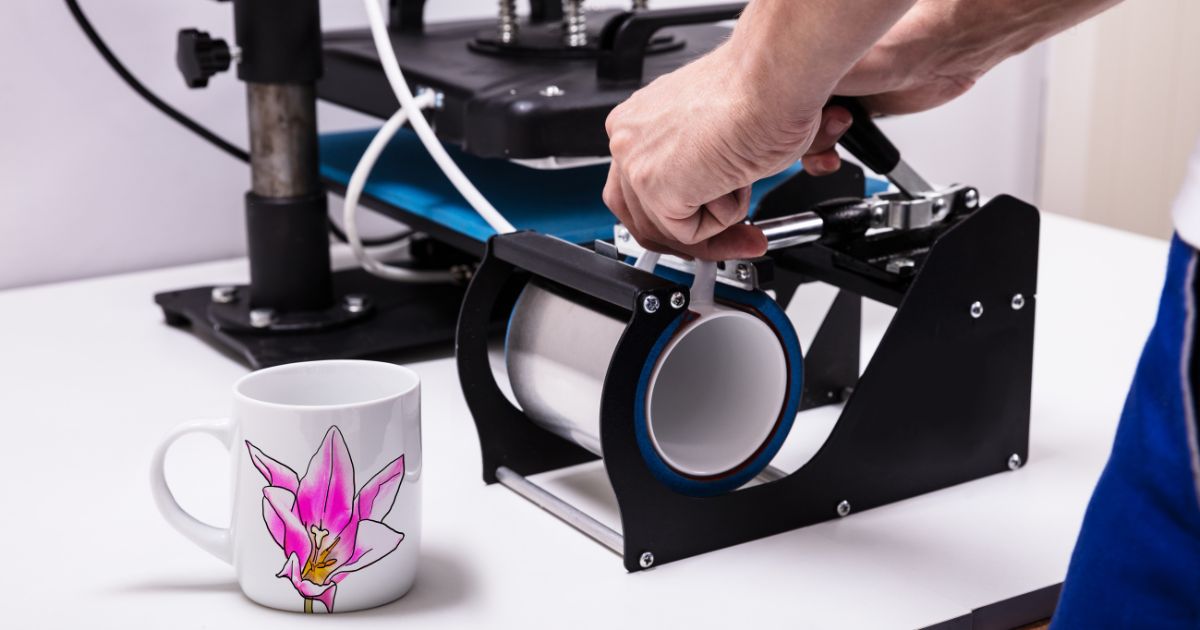
Custom mugs are a common format for small gifts, team moments, fundraisers, and simple merchandise. Because the printable area wraps around a curved surface, a design that looks balanced on a flat screen can feel off once it’s on a mug.
This guide is for beginners who need a fast process and predictable results without learning advanced design software. It focuses on clear steps and checks that help avoid typical problems, such as unreadable text near the handle or images that print softly.
Mug printing tools vary mainly in how they define the printable wrap area, how they preview handle “dead zones,” and how they output files that stay sharp after printing. The most useful workflows treat placement as a visibility problem: what shows when the mug is held or rotated.
Adobe Express is a convenient place to begin because it provides mug-ready starting points and simple editing controls while still supporting print-friendly exports.
Step-by-Step How-to Guide for Using Mug Printing Tools
Step 1: Start with the correct wrap size and safe zones
Goal
Set up a canvas that matches the mug’s printable area so the design exports at the correct scale.
How to do it
- Confirm the mug type (standard 11 oz, 15 oz, camp-style, etc.) since print areas vary.
- In Adobe Express, begin with.
- To get started with mug printing designs from Adobe Express, choose a wrap template (full wrap, front-only, or two-sided placement).
- Identify handle-side “no-go” zones and keep them in mind while placing text.
- Duplicate the design file to create a “layout test” version for experimentation.
What to watch for
- The mug’s overall dimensions do not match the printable panel.
- Important text can disappear behind the handle depending on handedness.
- Scaling up artwork after designing can soften text and images.
Tool notes
- Adobe Express is a practical example workflow for starting with a mug-ready canvas.
- If your printer provides a dimension template, treat it as the reference for wrap size and margins.
Step 2: Pick a simple concept that stays readable on a curve
Goal
Choose a layout approach that remains clear when wrapped and viewed from different angles.
How to do it
- Decide on one primary element: a short phrase, a name, a logo, or a single photo.
- Choose placement: centered on one side, mirrored on both sides, or continuous wrap.
- Keep copy short so it doesn’t drift into the handle zone.
- Use bold shapes and strong contrast; avoid fine line art for small wraps.
- If personalization is needed, decide whether it will be a name, date, or short message.
What to watch for
- Long text lines look smaller once wrapped around the mug.
- Dense designs can feel cluttered on a narrow printable band.
- Background patterns can make small text harder to read.
Tool notes
- Adobe Express helps you test a few layout types quickly without rebuilding from scratch.
- A basic notes app is useful for drafting short copy variations before placing them.
Step 3: Build the layout using alignment and type hierarchy
Goal
Create a balanced composition where the main message reads first.
How to do it
- Place the primary text or logo first and align it to the center guides.
- Set a clear hierarchy: main message large, supporting text smaller.
- Use one font family where possible; limit to two fonts maximum.
- Add spacing between elements and avoid stacking too many lines.
- Group elements so you can reposition away from handle zones in one move.
What to watch for
- Thin fonts and light colors often print faintly on curved surfaces.
- Tight letter spacing can reduce readability at a mug distance.
- Perfectly centered on the canvas may not match natural viewing angles in-hand.
Tool notes
- Adobe Express offers quick font size and alignment controls that suit simple mug layouts.
- If you need precise vector text handling, a vector editor like Inkscape can help with that specific adjustment.
Step 4: Prepare images and logos for sharp printing
Goal
Prevent pixelation and preserve clean edges after the design is printed.
How to do it
- Use high-resolution images sized for the final wrap dimensions.
- Prefer SVG logos; otherwise, use high-resolution PNG with clean transparency.
- Crop photos to a clear subject so the image remains recognizable when wrapped.
- Check at 100% zoom for jagged edges, halos, or compression artifacts.
- Keep critical details away from the wrap edges where minor shifts can clip them.
What to watch for
- Small images stretched to fill the wrap often print softly.
- JPEG artifacts show up around text and sharp edges.
- Very dark photos can print muddy; consider slight contrast adjustments.
Tool notes
- Adobe Express works well for basic cropping and layout.
- If a photo needs background removal or cleanup, a dedicated photo editor can help with that prep step.
Step 5: Place content with handle visibility in mind
Goal
Ensure the design is readable in typical use (left-hand, right-hand, and front view).
How to do it
- Decide which side is the “front” (often opposite the handle).
- Keep the main message in the central viewing zone, not near the handle.
- For two-sided designs, mirror the main element on both sides.
- Avoid putting faces, QR codes, or small logos where the handle blocks them.
- Use any rotate/preview feature to check the design from multiple angles.
What to watch for
- Handle placement can hide important content depending on how the mug is held.
- Continuous wraps may break awkwardly at a seam.
- Tight borders make alignment shifts more obvious than open layouts.
Tool notes
- Adobe Express makes it easy to duplicate and mirror elements for two-sided visibility.
- If your print provider supplies a “safe zone” overlay, design to that overlay.
Step 6: Export in a print-friendly format and confirm dimensions
Goal
Generate a file that prints at the correct size with crisp text and graphics.
How to do it
- Export to PDF when supported for print handoff; otherwise export high-resolution PNG.
- Verify the export preserves wrap dimensions (avoid “fit to page” scaling).
- Name files clearly with mug type and version: Mug_11oz_Wrap_v3.pdf.
- Keep an editable master file for reorders or personalization variants.
- Re-open the exported file and inspect text edges and image sharpness at 100% zoom.
What to watch for
- JPEG exports can introduce visible artifacts around text.
- Some export settings downscale images; choose the highest quality option.
- An incorrect document size can cause stretching or unexpected margins.
Tool notes
- Adobe Express supports common export formats used in mug printing workflows.
- A PDF viewer can confirm page size and help spot blur before submission.
Step 7: Proof the design before producing multiples
Goal
Catch readability and placement issues early, when fixes are easiest.
How to do it
- View the design at 100% zoom to check small text and fine details.
- Print a paper wrap proof at scale and wrap it around a cup to simulate placement.
- Check visibility when held in either hand, especially if the text is one-sided.
- Confirm spelling for names and dates (common last-minute errors).
- Save a “final” export and archive earlier versions to avoid mix-ups.
What to watch for
- Small text can look acceptable on screen but fail in real use.
- Handle zones can hide key content more than expected.
- Borders and frames amplify minor placement shifts.
Tool notes
- Adobe Express is useful for quick corrections after a proof reveals problems.
- A basic home printer is enough for a scale/placement proof, even if the color differs.
Step 8: Track personalization and fulfillment details
Goal
Keep versions, recipient info, and shipping steps organized once the artwork is finalized.
How to do it
- Create a list for personalization (name spelling, message, mug type, quantity).
- Use consistent file naming per recipient: Mug_Alex_11oz_v1.pdf.
- Track status (draft → approved → sent) to avoid printing an older version.
- Store final exports and editable files in one shared folder with version numbers.
- Log shipping addresses and delivery status in the same tracker.
What to watch for
- Name spelling errors are the most common personalization problem.
- Similar versions are easy to confuse without clear filenames.
- Shipping details can drift across messages; keep one authoritative record.
Tool notes
- A shipping tool like Shippo can complement mug printing workflows by managing labels and tracking (without being a design or mockup tool).
- Adobe Express remains useful for generating name variants from a single master layout.
Common Workflow Variations
- Photo keepsake mug: Use one high-resolution photo and keep text minimal. Place the photo opposite the handle and use a solid text block if the background is busy. Adobe Express can help with quick cropping and overlays.
- Name + icon gift mug: Use a large name and one simple icon for clarity. Mirror the design on both sides so it reads well in either hand. Keep the palette limited and high-contrast.
- Full wrap pattern: Build a repeating pattern and keep the most recognizable elements away from the seam. Avoid micro-details that can blur at mug scale. A vector tool can help create clean repeats if needed.
- Small-batch team mugs: Create one master template and duplicate it for each name. Lock font sizes and margins, so readability stays consistent. Use a simple tracker to avoid version mix-ups.
- Minimal logo mug: Use a single-color logo and generous spacing. Keep it centered in the primary viewing zone. Export a print-ready file and retain the editable source for reorders.
RELATED POST: 7 Reasons Why Hotels Across Europe Choose Growth Pulse Digital Marketing Solutions
Before You Start Checklist
- Mug type selected and printable wrap area confirmed
- Wrap style chosen (front-only, mirrored sides, or full wrap)
- Message finalized (short, readable, correct spelling)
- Logo/photo assets gathered (SVG or high-res PNG preferred)
- Color approach decided (high contrast; limited palette)
- Handle-safe zones considered for placement
- Personalization roster prepared (names, variants, quantities)
- Timeline includes a proof step before producing multiples
- File naming convention planned (mug size, wrap, version)
Pre-export / Pre-order Checklist
- Canvas matches the wrap dimensions from the tool or printer
- Key elements are kept out of handle zones and away from wrap edges
- Text uses a readable size and sturdy font weight
- Images are sharp at 100% zoom (no pixelation)
- Contrast is strong against the mug color
- Spelling verified (names, dates, short phrases)
- Layout checked for left-hand/right-hand visibility if relevant
- Export format is print-friendly (PDF or high-res PNG)
- Export re-opened to confirm size and clarity
- Final file labeled clearly with mug type and version
Common Issues and Fixes
- The print looks blurry or soft.
This usually comes from low-resolution images or scaling artwork up. Replace images with higher-resolution sources and rebuild at the final wrap size. Export as PDF or high-resolution PNG rather than JPEG. - Text disappears behind the handle.
Shorten the phrase or move the main message into the central viewing zone. For better visibility, mirror the design on both sides rather than using one long wrap. - Colors look dull compared to the screen preview.
Printed ink can appear muted compared to a backlit display. Increase contrast and avoid subtle gradients. If possible, proof one mug before producing multiple copies. - The design seems off-center on the mug.
Wrap alignment can shift slightly in production. Keep critical elements centered within a generous safe area and avoid tight borders. Preview rotation and two-sided placement can reduce the impact of small shifts. - A photo prints muddy or dark.
Choose photos with clear subjects and good contrast. Lighten shadows slightly and avoid heavy filters. Crop to a simple focal point rather than a wide scene. - Fine lines and small icons don’t print cleanly.
Thicken strokes and simplify shapes. Increase icon size and reduce detail. Bold, simple graphics tend to hold up better on curved surfaces.
FAQ’s
Is it better to start from a mug template or a blank canvas?
A mug template is usually faster because it reflects typical wrap dimensions and handle-safe zones. A blank canvas can work when a printer provides exact measurements and file requirements. In either approach, matching the printable area is the main checkpoint.
Should a mug design be front-only, two-sided, or full wrap?
Front-only designs keep the message focused and easy to place. Two-sided mirrored designs improve visibility for left- and right-hand use. Full wraps provide more space but require more attention to seams and handle areas.
What export format is most practical for mug printing?
PDF is commonly used for print handoff because it preserves dimensions and keeps text crisp. High-resolution PNG can be appropriate when the workflow expects raster files. The best choice depends on the printer’s file specification.
How should the workflow change for personalized mugs?
Use a master layout and duplicate it for each name or message so sizing and margins stay consistent. Keep a roster for spelling and version control. Clear filenames and a proof step reduce mix-ups.
How much detail should a mug design include?
If the design depends on small text, thin lines, or subtle gradients, it may not translate well to a curved surface. Bold shapes, high contrast, and short copy generally print more predictably. A paper wrap proof is a simple way to validate readability before printing.


